Step 3. Enable Single Sign-On (SSO) Authentication

Follow the steps below to complete the configuration and test the new login method using Single Sign-On (SSO).
- In the Windows search bar, type Registry Editor and open this application. (NL: Register-editor / FR: Éditeur du Registre) and open this application.
Tip: you can also type “regedit” in the Start menu or Windows search bar to quickly find the app.
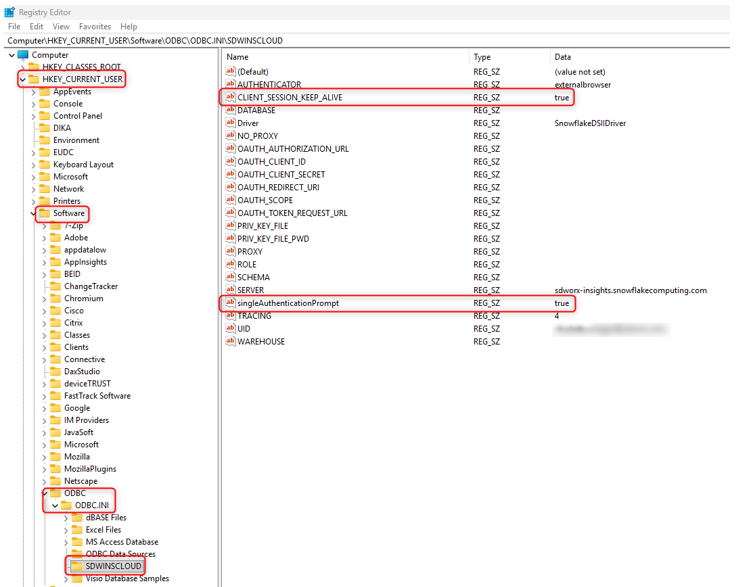
- Navigate to the following registry path if the ODBC installation was performed using the default settings as described above: Computer\HKEY_CURRENT_USER\Software\ODBC\ODBC.INI\SDWINSCLOUD (see printscreen below)
- Select the SDWINSCLOUD data source by clicking on it. Its parameters will appear in the right-hand pane.
- Add a new parameter:
- From the top menu, choose Edit → New → String Value.
- Name the new string value: singleAuthenticationPrompt
- Double-click the newly created entry and set its value to: true
- Click OK to confirm.
- Add a second parameter:
- From the top menu, choose Edit → New → String Value.
- Name the new string value: CLIENT_SESSION_KEEP_ALIVE
- Double-click the newly created entry and set its value to: true
- Click OK to confirm.
- Close the Registry Editor and return to the ODBC Data Source Administrator.
- Select the SDWINSCLOUD system data source and click Configure.
- Click Test to verify the connection.
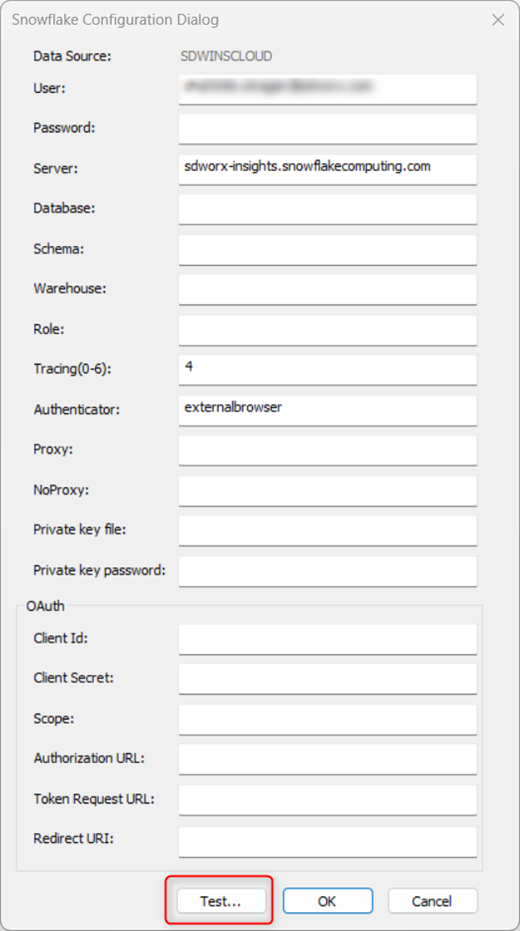
- A web browser window will open and redirect you to log in to Snowflake using mysdworx SSO.
- After a successful login, the test will complete and a success message will be displayed.
